Trico Washer Rebuild

Tell us about any of your Land Rover related projects here.
Post Reply
User avatar
BYL
Posts: 101
Joined: Sat Feb 21, 2015 2:02 pm
Location: Prague

Trico Washer Rebuild

Post by BYL » Thu May 26, 2022 8:54 am

Posting this just in case it helps to avoid any of these original bottles/pumps getting needlessly binned.

This started because I have an after market (still Trico but wrong size/shape) bottle unceremoniously rammed into the original bracket that has been bent to fit. This is, of course, on the dash so I have to look at it all the time that I'm driving.

I acquired the correct bottle off fleabay reported to be 'pump not working, spare pump supplied".
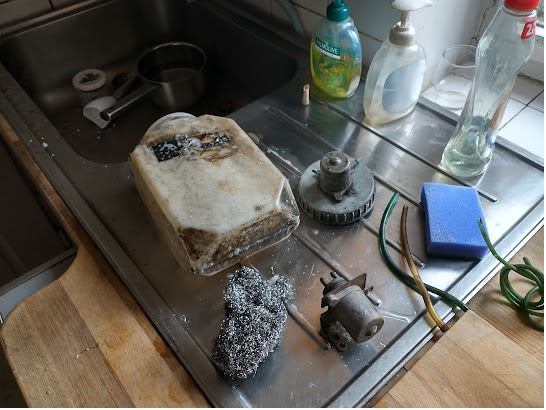
Sink.JPG
Sink.JPG (51.75 KiB) Viewed 782 times
BYL my 2A has its original bottle but with the original pump missing so I got to thinking two bottles, two pumps, could I get two complete sets out of this...?

Tests proved that the fleabay pump fitted in the cap was dead, spare pump made hopeful noises. First step is to separate the dead pump from the cap. It is riveted on so the usual trick, in this case a 3.5mm drill to take the heads off. The rivets are also the only thing holding the pump part to the motor part so, once they are free, the cap, the pump and the motor are all free of each other. A plastic disc is probably there to try and minimise water getting into the motor but you can possibly see from the green on the brushes that it had got damp in there.
Rivet.JPG
Rivet.JPG (56.45 KiB) Viewed 782 times
Next step is to remove the 'end plate' with the inlet and outlet stubs from the pump. As well as allowing you to check that the impeller is still serviceable you also need to able to get at it to line everything up during reassembly. Four cross head self tappers. On one of the two that I did the screws were very rusty and two of the heads twisted of. Not a crisis though, the end plate still came off over the remains of the screws and left enough sticking out that I was able to get some small mole grips onto the remains of the screws and twist them out. With that done the next thing was to get the brushes out for a clean. The brush/terminal slides straight up out of the plastic housing. The spring holding the brush onto the commutator is contained in the terminal housing and should not launch itself across the garage, at least not at this stage.

Impeller.JPG
Impeller.JPG (50.52 KiB) Viewed 782 times
The brush assemblies are next to come to bits. This is where springs flying across rooms is a distinct possibility. With the spring pressure taken off, the brush arm pulls thorough the front of the brass terminal gubbins.

Last disassembly is to fish out the armature. The permanent magnets hold it into the casing but there is nothing else to worry about on the other end, just pull.
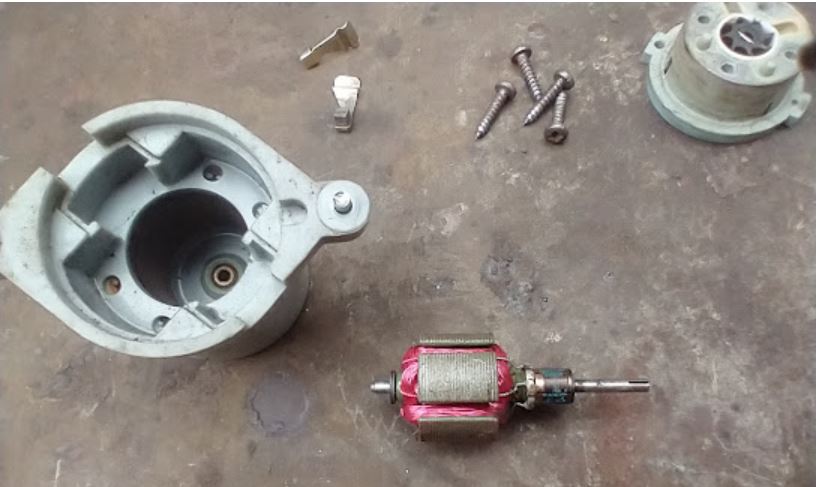
Armature.JPG
Armature.JPG (58.37 KiB) Viewed 782 times
You can see the green on the commutator. This all cleaned up very nicely in the end with some 800 wet-o-dry. Note the slot in the end of the spindle. This is what a 'key' slots into which drives the impeller and needs lining up during reassembly.

I've apparently reached max picture space for this post so reassembly in part 2.
Hugo.

54GF42 S3 GS
43GF59 S3 FFR
61KB78 S3 109' FFR
BYL S2A 88' RAE Farnborough runway hack

User avatar
BYL
Posts: 101
Joined: Sat Feb 21, 2015 2:02 pm
Location: Prague

Re: Trico Washer Rebuild

Post by BYL » Thu May 26, 2022 10:42 am

Part 2 Reassembly:

Only a couple of things to add beyond the standards Haynes mantra.

First up, the armature. Cleaned the commutator but also eyeballed the windings looking for any signs that the ceramic coating is breaking down on the wires. If it is then it manifests itself as tiny little flakes. No signs here so I assumed good. a little sniff of copper ease on far end of the spindle before it goes in to give it a head start for the next 40 odd years of its service. The brushes just push in one at a time.
Back 1.JPG
Back 1.JPG (34.89 KiB) Viewed 777 times
Next, the pump gubbins, not forgetting the plastic circle thing that goes between pump and motor. As mentioned the key needs to fit in the slot of the spindle. I did this by popping out the impeller from the housing, fitting the housing and then putting the impeller back. I put the impeller back with a tiny swipe of red rubber grease so that it is a bit easier when it first starts pumping before the screen wash solutions gets around it. Warning, the key is only light press fit into the impeller and can come out, and fall on the floor, and bounce under the bench.

Back 2.JPG
Back 2.JPG (26.49 KiB) Viewed 777 times
Last is the end plate, just need to check that the inlet and outlet stubs line up with the pump, there is nothing to automatically stop you from fitting it 90 or 180 degrees out. Then back onto the cap. Bear in mind that there is nothing securing the pump to the motor until it is back on the cap. I replaced the rivets with M2 set screws. Re-plumb the hoses (recommend dunking them in hot water to get them soft) amd job's a good'un. The defective motor was back to life just with cleaning all the electrical connections.
Done.JPG
Done.JPG (50.04 KiB) Viewed 777 times
Two working pumps, two bottles, now time for the crashing realisation: 12v motors, 24v lightweight. Duh! I pulled apart the pump off the after market, it is still Trico so mostly the same dimensions, with a view to swapping the armature, sadly the later version has the commutator at the other end of the spindle. In the end though a bit of bodging and I have fitted the 24 volt pump complete to the top of the bottle. Not perfect but a vast improvement on what was there. And I've got a spare 12v pump.
Bottles.JPG
Bottles.JPG (64.22 KiB) Viewed 777 times
In summary, these things are eminently fixable.
Hugo.

54GF42 S3 GS
43GF59 S3 FFR
61KB78 S3 109' FFR
BYL S2A 88' RAE Farnborough runway hack

User avatar
Bob Fell
Cake Guru
Posts: 3044
Joined: Wed Sep 18, 2013 7:17 am
Location: Melton Mowbray

Re: Trico Washer Rebuild

Post by Bob Fell » Thu May 26, 2022 7:22 pm

Absolutely brilliant, thanks for posting.
Regards,
Bob
042Bobf


19HF27 Lightweight FFR ex Gurkha Field Force HQ, various Gurkha Sigs Tps and Comp Ord Depot Hong Kong 1980-1997.
42ET39 Narrow Track Sankey ex BAOR 22 & 7 Sig Regts, 16/5 Lancers, 2 RTR, 9/12 Lancers & QDG 1969-2001.

User avatar
Loulou
Pastry Chef
Posts: 570
Joined: Wed Jul 04, 2018 12:12 pm
Location: France

Re: Trico Washer Rebuild

Post by Loulou » Fri May 27, 2022 6:25 am

Dobrý den BYL,

I don't have this type of washer on my LWT.
Your approach is remarkable, didactic, very constructed and useful to the community.

Thank you here for your involvement.
Regards.
Looloo.
27GJ77 - 1977 LWT SIII FFR - 1st. Royal Horse Artillery - B Battery (BAOR)

User avatar
StuWright
Master Baker
Posts: 1740
Joined: Wed Feb 24, 2016 11:10 pm
Location: Southampton

Re: Trico Washer Rebuild

Post by StuWright » Sun Jun 05, 2022 11:19 pm

Great job and worth the effort. I have the same set up and always find the bottle cap isn't a tight seal and drips if I fill to the top.
Thanks

Stu

55AM52 Ex RAF Land Rover Lightweight GS

Post Reply