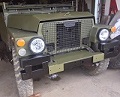
Project 56-KB-23

Tell us about any of your Land Rover related projects here.
User avatar
avgenisis
Posts: 97
Joined: Thu Jan 05, 2017 5:28 pm
Location: Norfolk, UK

Re: Project 56-KB-23

Post by avgenisis » Fri Jan 20, 2017 1:10 pm

Right where to start, chassis, or electrics!

... chassis is coming on, rear floor removed, last night, and vehicle shipped (next door) to media blasters today, to remove all the tar, and clear the way to remove the rear x-member and add new metal. -good news no rot on top of chassis legs, so all sound. to be fair I could have patched the rear member, but really didn't like the idea of plating under the rear hanged, form hassle and strength.
IMG_0241.JPG
IMG_0241.JPG (51.15 KiB) Viewed 1938 times
IMG_0240.JPG
IMG_0240.JPG (46.28 KiB) Viewed 1938 times
Last edited by avgenisis on Fri Jan 20, 2017 1:33 pm, edited 1 time in total.

User avatar
avgenisis
Posts: 97
Joined: Thu Jan 05, 2017 5:28 pm
Location: Norfolk, UK

Re: Project 56-KB-23

Post by avgenisis » Fri Jan 20, 2017 1:13 pm

.. electrics.. well!
B7A220D8-8F8E-4F39-A0C2-0CAA9E5ACB55.JPG
B7A220D8-8F8E-4F39-A0C2-0CAA9E5ACB55.JPG (53.61 KiB) Viewed 1937 times
luckily i've been an auto electrician in a past life, so the smell of crispy plastic doesn't put me off, but the lengths and bodges people go to to still amaze me, not do something properly and achieve something remotely satisfactorily...
139F1663-05A8-4B78-B57C-4B5D8F85D3A9.JPG
139F1663-05A8-4B78-B57C-4B5D8F85D3A9.JPG (61.91 KiB) Viewed 1937 times
658586B1-013F-4AAB-AB4A-52273D8E28AF.JPG
658586B1-013F-4AAB-AB4A-52273D8E28AF.JPG (56.04 KiB) Viewed 1937 times
IMG_4473.JPG
IMG_4473.JPG (170.43 KiB) Viewed 1937 times
Last edited by avgenisis on Fri Jan 20, 2017 1:35 pm, edited 1 time in total.

User avatar
avgenisis
Posts: 97
Joined: Thu Jan 05, 2017 5:28 pm
Location: Norfolk, UK

Re: Project 56-KB-23

Post by avgenisis » Fri Jan 20, 2017 1:20 pm

IMG_4476.JPG
IMG_4476.JPG (171.64 KiB) Viewed 1934 times
I have now pruned a box of spurious wires from behind the dash, spliced and soldered most of the heated original loom, (luckily all the wrecked wiring was from additional "features" - now there is a surprise....

End result I've less working, but safely and correctly. Also at some point they moved the IR switch over to the LHS sub panel, and twisted and ty-wrapped the cables together behind it! - that is now corrected / deleted, although not relocated! -so there is another part needed, the guard latch thingy!!

moving on, I've got replacement units for the front sidelights, how do you get into the rear of the boxes, as I can see a whole world of scotty clips in there too, is it a matter of drilling rivets or are the bolted somehow?? (I'm probably missing the obvious, similarly the rear light boxes?
Last edited by avgenisis on Fri Jan 20, 2017 1:36 pm, edited 1 time in total.

User avatar
avgenisis
Posts: 97
Joined: Thu Jan 05, 2017 5:28 pm
Location: Norfolk, UK

Re: Project 56-KB-23

Post by avgenisis » Fri Jan 20, 2017 1:27 pm

On the plus.... starting to look the part!
IMG_0239.JPG
IMG_0239.JPG (53.96 KiB) Viewed 1932 times
and a military 5 BRG engine too!
C7DBAE6F-C8C1-45B8-A59D-2DEE5A9D9BFD.JPG
C7DBAE6F-C8C1-45B8-A59D-2DEE5A9D9BFD.JPG (14.41 KiB) Viewed 1932 times
.

Are twin fan belts normal?
IMG_4479.JPG
IMG_4479.JPG (66.75 KiB) Viewed 1930 times
Another change of tack, the doors... the fit is horrendous, the back edges are sticking a good 2cm out from the side, I'm wondering if the hinges have been wrung? also the rubber trim fowls all round and stick out the door gaps, so I'm thinking first job is to remove it all and see if things get better..

still aiming for VED / MOT end of month, thats a 14 day turn around!

Cake Calls :dbday:

User avatar
Bob Fell
Cake Guru
Posts: 3044
Joined: Wed Sep 18, 2013 7:17 am
Location: Melton Mowbray

Re: Project 56-KB-23

Post by Bob Fell » Fri Jan 20, 2017 5:56 pm

avgenisis wrote:moving on, I've got replacement units for the front sidelights, how do you get into the rear of the boxes, as I can see a whole world of scotty clips in there too, is it a matter of drilling rivets or are the bolted somehow?? (I'm probably missing the obvious, similarly the rear light boxes?
Bolted on but don't be surprised to find some dodgy riveting, especially to the front light boxes if the side retaining brackets have fractured. The rear lighting are behind a plate (o/s) and the tool box (n/s) and usually there should be no problem removing them, seized and corroded bolts allowing.

Good work btw, but I don't envy you sorting out the PO crap wiring.
Keep the pics coming.

Regards
Bob
042Bobf


19HF27 Lightweight FFR ex Gurkha Field Force HQ, various Gurkha Sigs Tps and Comp Ord Depot Hong Kong 1980-1997.
42ET39 Narrow Track Sankey ex BAOR 22 & 7 Sig Regts, 16/5 Lancers, 2 RTR, 9/12 Lancers & QDG 1969-2001.

User avatar
avgenisis
Posts: 97
Joined: Thu Jan 05, 2017 5:28 pm
Location: Norfolk, UK

Re: Project 56-KB-23

Post by avgenisis » Wed Jan 25, 2017 3:15 pm

Right, we have a stripped rear end! finished 2am this morning.!

media blasting the rest of the rear chassis now the rear floor is removed (and axle whilst i was at it) showed no holes, Result! (Pix to follow) so the new rear cross member + extensions will eradicate all known rot at the back.

Sadly he only time its been welded PO (under the rear spring hanger) looks like they cooked the loom, so that is now removed, new cables ordered, and soldering iron primed for a new one to be fabricated.

Hoping to get the rear X-member welded on this week, and start the re-build process at the back end (and re-paint the newly blasted and repaired rear.).

Tonight the front wiring. nothing too major there as I have already pruned all the PO extra wires / switches etc.

The only odd thing, I only seem to have one relay, see below, so I need to track down what is going on there.....
only relay in vehicle.JPG
only relay in vehicle.JPG (844.57 KiB) Viewed 1879 times
keep you guys posted.. time for much :dbday:

User avatar
Bob Fell
Cake Guru
Posts: 3044
Joined: Wed Sep 18, 2013 7:17 am
Location: Melton Mowbray

Re: Project 56-KB-23

Post by Bob Fell » Wed Jan 25, 2017 5:30 pm

Novel heater tap lash up you've got there,
Replacing?
You're certainly cracking on with it, to say the least. I notice the front bumper looks a bit Dutch Lwtish with those reinforcements.

Regards
Bob
042Bobf


19HF27 Lightweight FFR ex Gurkha Field Force HQ, various Gurkha Sigs Tps and Comp Ord Depot Hong Kong 1980-1997.
42ET39 Narrow Track Sankey ex BAOR 22 & 7 Sig Regts, 16/5 Lancers, 2 RTR, 9/12 Lancers & QDG 1969-2001.

User avatar
avgenisis
Posts: 97
Joined: Thu Jan 05, 2017 5:28 pm
Location: Norfolk, UK

Re: Project 56-KB-23

Post by avgenisis » Wed Jan 25, 2017 5:37 pm

strangely, its one of the few things that work really well!! :lol: :lol:

It may be staying, 90 degrees to heat v no heat, none of this twisting and turning milarky.

haha

User avatar
avgenisis
Posts: 97
Joined: Thu Jan 05, 2017 5:28 pm
Location: Norfolk, UK

Re: Project 56-KB-23

Post by avgenisis » Thu Jan 26, 2017 1:04 pm

Well another 2am finish, and a fair few of these....
IMG_4500.JPG
IMG_4500.JPG (59.43 KiB) Viewed 1846 times
and the result is this....
front lights on.jpg
front lights on.jpg (149.59 KiB) Viewed 1846 times
All spurious wiring removed forward of the bulkhead, melted wiring replaced and Success!

Side lights, flashers (and Repeaters L & R wings - look like dutch ones), Dip Beam and I'm able to flash Main beam - all from column and 6 way working, also now the horn works too!
IMG_4502.JPG
IMG_4502.JPG (29.95 KiB) Viewed 1846 times

Haven't clipped it all down yet under the wings and bonnet as the heat shrink and the loom tubing hasn't arrived yet, but no smokey smells is a sure big progression.

Didn't quite realize how bent the bumper was until i put a straight edge across the front, another purchase (creating a want list for the forum as we speak!!)

Also the drivers side headlight box has taken a wallop in the center, next to the headlight in the past, so needs removing, repairing and refitting..

I think the "no constant main beam" issues relates to my lack of relays, and the fact the hazard switch and brake test button are also non operational.

Next stop.. Dash out..... but that is next week, welding weekend and awaiting cable delivery so i can make a new rear loom!!

xy :dbday: next!

User avatar
avgenisis
Posts: 97
Joined: Thu Jan 05, 2017 5:28 pm
Location: Norfolk, UK

Re: Project 56-KB-23

Post by avgenisis » Thu Jan 26, 2017 7:06 pm

Door Hinges, mine look buckled, any shots of what they should look like when they are closed (closeup) would be greatly received, will post some shots of mine tomorrow.

also where do the fixed seat belts fix to? I have NOS ones ready to be fitted but cant see any loops etc!

cheers

:D X!

Post Reply