
36 FG 71 Total Rebuild
Re: 36 FG 71 Total Rebuild
And then on to cracking on with the bulkhead...
- Attachments
-
- 2021-01-15 18.13.15.jpg (1.71 MiB) Viewed 1906 times
Re: 36 FG 71 Total Rebuild
Currently on the painful exercise of rebuilding the rear tub...
As this is a 2A, it appears as though the two outer seatbelt lower mounts bolt into the standard 2A triangular box bracket and that in turn bolts into a plate which is secured to the front crossmember of the rear body. One of the brackets bolted to the forward body crossmember is OK and the other one needs replacing. I could fabricate one, but this got me thinking...
On the 2A, unless mine was so badly corroded that I've lost another substantial bracket on either side (which seems unlikely), there appears to be no anchorage to the chassis frame on either side to the rear fuel tank outrigger. Am I correct, as I'm pretty sure the Series 3 LWT did have the outer seat belt mounts anchored to the chassis outrigger. Does anybody have any pictures of the Series 3 configuration and are the brackets readily available?
Many thanks!
As this is a 2A, it appears as though the two outer seatbelt lower mounts bolt into the standard 2A triangular box bracket and that in turn bolts into a plate which is secured to the front crossmember of the rear body. One of the brackets bolted to the forward body crossmember is OK and the other one needs replacing. I could fabricate one, but this got me thinking...
On the 2A, unless mine was so badly corroded that I've lost another substantial bracket on either side (which seems unlikely), there appears to be no anchorage to the chassis frame on either side to the rear fuel tank outrigger. Am I correct, as I'm pretty sure the Series 3 LWT did have the outer seat belt mounts anchored to the chassis outrigger. Does anybody have any pictures of the Series 3 configuration and are the brackets readily available?
Many thanks!
Re: 36 FG 71 Total Rebuild
I assume you mean 346052 and 346053, on the tub not chassis, to save a lot typing. Have a look at the below.
https://forum.militarylightweight.co.uk ... 052#p60499
https://forum.militarylightweight.co.uk ... 052#p60499
Re: 36 FG 71 Total Rebuild
Thanks 88lr.
Those are the ones I currently have, and I see that they are the same on the Series 3 LWT parts microfiche. What I'm trying to understand is if there was any improvement made to the outer seatbelt anchorages to fit down on to the chassis outrigger rather than just bolting into the rear tub. The inner ones both mount on the crossmember, so are solid, but I'd certainly prefer the B post lower anchor point to be actually anchored through to the chassis. How does it work on the more recent vehicles - say 1980 onwards?
Those are the ones I currently have, and I see that they are the same on the Series 3 LWT parts microfiche. What I'm trying to understand is if there was any improvement made to the outer seatbelt anchorages to fit down on to the chassis outrigger rather than just bolting into the rear tub. The inner ones both mount on the crossmember, so are solid, but I'd certainly prefer the B post lower anchor point to be actually anchored through to the chassis. How does it work on the more recent vehicles - say 1980 onwards?
Re: 36 FG 71 Total Rebuild
It didn’t change!
Re: 36 FG 71 Total Rebuild
Thank you! This suggests that the various brackets I have seen are just upgrades by owners. I'll build it as it should be then!
Re: 36 FG 71 Total Rebuild
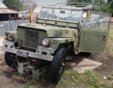
This is like going back in time a year to when I was doing almost exactly the same type of work on my chassis. Keep it up! Obviously you have made loads of progress since then.
diffwhine wrote: ↑Sun Mar 17, 2019 6:16 pmAngle grinding day again today. Must have upset the neighbours big time having gobbled up at least 20 cutting and grinding discs now that my plasma cutter has gone to the great workshop in the sky. Looks worse that it is, but I'm determined to rebuild what I can of this chassis even if it is a case of Trigger's Broom...
Lots of rot in the bottom section of the right hand chassis rail. Ran out of steel so can't fill any holes until next weekend at the earliest. All prepared and ready to go for the next phase of metal gluing!
Re: 36 FG 71 Total Rebuild
I'm getting there...
The rear tub is off with a specialist fabricator to sort out some repairs and also to fit the floor and front cross member correctly. Will post when it comes back.
I'm sending a whole heap off other bits off for blasting (bulkhead, rad panel etc.)
When I get a minute, I'll do a bit of an update. Good progress being made now, but got to do some real work and make some money to pay for it!
The rear tub is off with a specialist fabricator to sort out some repairs and also to fit the floor and front cross member correctly. Will post when it comes back.
I'm sending a whole heap off other bits off for blasting (bulkhead, rad panel etc.)
When I get a minute, I'll do a bit of an update. Good progress being made now, but got to do some real work and make some money to pay for it!
-
removeduser185

- Cake Guru
- Posts: 3531
- Joined: Thu Jun 18, 2015 10:37 pm
Re: 36 FG 71 Total Rebuild
The brackets you saw may have been the later ones which were fitted to Lightweights with the inertia reel belts. They had a frame which which was fitted to the tub immediately behind the bulkhead and the footings of this were secured with extension pieces beneath the tub onto the chassis. But, frankly, it doesn't make a lot of difference - the brackets as fitted to yours, and mine, are quite strong enough to do their job - they'll break your ribcage before they break off from the vehicle itself!
Re: 36 FG 71 Total Rebuild
Thanks Fred,
That fits because now I think of it, I think I saw them on some late release Dutch Lightweights up at Jacksons in Doncaster
I plan to keep as is although I need to fabricate one of the brackets as its fallen to pieces. Luckily the other side is good so I only need to make a mirror image.
Interesting how one side is fine and one side is corroded away. Same on the rear tub seatbelt mounts in the lower body sides. One side the U shaped section which goes in the body was rusted away, but the bodyside is perfect. On the other side, the body side has corroded away, but the bracket is perfect. So much for logic on sacrificial corrosion!
That fits because now I think of it, I think I saw them on some late release Dutch Lightweights up at Jacksons in Doncaster
I plan to keep as is although I need to fabricate one of the brackets as its fallen to pieces. Luckily the other side is good so I only need to make a mirror image.
Interesting how one side is fine and one side is corroded away. Same on the rear tub seatbelt mounts in the lower body sides. One side the U shaped section which goes in the body was rusted away, but the bodyside is perfect. On the other side, the body side has corroded away, but the bracket is perfect. So much for logic on sacrificial corrosion!