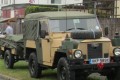
My "other" project - the shepherd's hut
- removeduser185
- Cake Guru
- Posts: 3531
- Joined: Thu Jun 18, 2015 10:37 pm
My "other" project - the shepherd's hut
One or two of you have asked me to say something about my “other” project – the one which has taken my eye, temporarily, off the Land Rover ball. I’m not going to make this a big thread, nor wil I update it at every turn as I did with 23HF14, but, by way of a diversion, I will run this blog on an occasional basis until it is finished. If, however, it is thought entirely inappropriate, then, of course, the moderators are free to delete it and I shall stop there! I don’t want to bore anyone and certainly don’t wish to distract from the core purpose of the site – the military Lightweight.
When we retired, Freda and I decided to put aside a sum of money each for a project. I made up my mind and spent mine straight away – 23HF14 being the result. Freda has waited, but finally, a couple of months ago she decided “I want a shepherd’s hut”. So, that is what she shall have!
Within a day or two, I had bought the basics from a chap in Yorkshire. He gave me an excellent deal, provided I made up my mind within 48 hours. I could then also have free delivery as he was coming to the Brecon Beacons on holiday and could bring it with him.
So, I ordered a chassis with oak axles and the basic frame of a 16’ x 7’6” shepherd’s hut. It worked out a lot cheaper for me to buy these than it would have been for me to build them from scratch. I also ordered the domed corrugated galvanised iron (CGI) roof at the same time. And, it arrived on an enormous trailer behind (of course) his Land Rover. Ideally, he would have followed the A40 until the final 7 miles of C class road, but, he followed his satnav and the shortest route. Not a great idea as it is along some very twisting and narrow lanes. Funnily enough, while navigating said lanes he met a chap with a low-loader delivering a tower crane to the HEP project currently underway in the valley – he too was following a satnav and in even greater predicament than the shepherd’s hut man!
But, it arrived, eventually, with the rueful comments that delivery would not have been free had he known where we live! Too late!
The first thing was to manoeuvre the hut chassis into place in the garden – using the Freelander. I’d have used the Lightweight, had it been running properly and had it had a better turning circle.
Once it was in place, I fitted a thick plywood floor, which had been waterproofed with bitumen, on which to build the frame.
With the frame in place I covered the outside walls with plywood and covered them and the roof with a breathable, waterproof membrane. We then fitted the CGI roof which wasn’t easy given that it was now some 12 feet off the ground and the individual bowed sheets of CGI were both awkward and heavy. Freda was up the ladder, I passed each sheet up to her, she held it still until I then climbed up an adjacent ladder and, between us, we wriggled the sheets over the roof and teck-bolted them down. That was a bit of a bind, as well as the teck-bolts wouldn’t self tap as they should have done so each needed a drilled pilot hole.
The next job was fitting electric wiring for a ring main and lighting circuit. I used a small garage consumer unit and caravan power inlet socket. We don’t intend to use the electricity, but, who knows what we may need in the future, so it is better to have the wiring and sockets in place now, than try and fit them later when all the cladding and insulation is in place. We have HPP lamps for lighting and a wood-burning stove to keep it warm.
With the electrics done I was free to fit an OSB floor. This was 4” proud of the original floor with the gap insulated with fleeces from local sheep. On top of this there will be oak laminate flooring which I managed to pick up locally – enough for the job for just £40, which was pleasing. I found the advert in the local free magazine.
Yesterday, Freda and I went to Leominster to an architectural salvage yard where we found a matching pair of galvanised steel windows which are ideal and I spent today removing the glass and cleaning them up prior to re-fitting what panes I can plus more I shall have to buy in town to replace the broken ones.
In the background, I have been priming the matchboard interior cladding which will go over more fleece insulation and a special membrane designed to reduce the heat inside from the sun as well as keeping it warm in the winter. With the hut having CGI roof and walls, this is important if it is to be at all comfortable in the summer. I still have 120 planks to go!
At one end there will be a double bed and I have bought the mattress and lathes for that. It will be built in with cupboards beneath. At the other end, on a small plinth, will be a wood-burning stove beside a table and chair with a pair of armchairs in the middle of the hut and shelves for books on the walls. Above the bed I will fit a small stained-glass window which I found in a local antique shop. I still need to make a door – probably a stable door with a window in the upper half as the hut will need as much light as I can get.
More to follow, in due course, including photos of the hut itself.
When we retired, Freda and I decided to put aside a sum of money each for a project. I made up my mind and spent mine straight away – 23HF14 being the result. Freda has waited, but finally, a couple of months ago she decided “I want a shepherd’s hut”. So, that is what she shall have!
Within a day or two, I had bought the basics from a chap in Yorkshire. He gave me an excellent deal, provided I made up my mind within 48 hours. I could then also have free delivery as he was coming to the Brecon Beacons on holiday and could bring it with him.
So, I ordered a chassis with oak axles and the basic frame of a 16’ x 7’6” shepherd’s hut. It worked out a lot cheaper for me to buy these than it would have been for me to build them from scratch. I also ordered the domed corrugated galvanised iron (CGI) roof at the same time. And, it arrived on an enormous trailer behind (of course) his Land Rover. Ideally, he would have followed the A40 until the final 7 miles of C class road, but, he followed his satnav and the shortest route. Not a great idea as it is along some very twisting and narrow lanes. Funnily enough, while navigating said lanes he met a chap with a low-loader delivering a tower crane to the HEP project currently underway in the valley – he too was following a satnav and in even greater predicament than the shepherd’s hut man!
But, it arrived, eventually, with the rueful comments that delivery would not have been free had he known where we live! Too late!
The first thing was to manoeuvre the hut chassis into place in the garden – using the Freelander. I’d have used the Lightweight, had it been running properly and had it had a better turning circle.
Once it was in place, I fitted a thick plywood floor, which had been waterproofed with bitumen, on which to build the frame.
With the frame in place I covered the outside walls with plywood and covered them and the roof with a breathable, waterproof membrane. We then fitted the CGI roof which wasn’t easy given that it was now some 12 feet off the ground and the individual bowed sheets of CGI were both awkward and heavy. Freda was up the ladder, I passed each sheet up to her, she held it still until I then climbed up an adjacent ladder and, between us, we wriggled the sheets over the roof and teck-bolted them down. That was a bit of a bind, as well as the teck-bolts wouldn’t self tap as they should have done so each needed a drilled pilot hole.
The next job was fitting electric wiring for a ring main and lighting circuit. I used a small garage consumer unit and caravan power inlet socket. We don’t intend to use the electricity, but, who knows what we may need in the future, so it is better to have the wiring and sockets in place now, than try and fit them later when all the cladding and insulation is in place. We have HPP lamps for lighting and a wood-burning stove to keep it warm.
With the electrics done I was free to fit an OSB floor. This was 4” proud of the original floor with the gap insulated with fleeces from local sheep. On top of this there will be oak laminate flooring which I managed to pick up locally – enough for the job for just £40, which was pleasing. I found the advert in the local free magazine.
Yesterday, Freda and I went to Leominster to an architectural salvage yard where we found a matching pair of galvanised steel windows which are ideal and I spent today removing the glass and cleaning them up prior to re-fitting what panes I can plus more I shall have to buy in town to replace the broken ones.
In the background, I have been priming the matchboard interior cladding which will go over more fleece insulation and a special membrane designed to reduce the heat inside from the sun as well as keeping it warm in the winter. With the hut having CGI roof and walls, this is important if it is to be at all comfortable in the summer. I still have 120 planks to go!
At one end there will be a double bed and I have bought the mattress and lathes for that. It will be built in with cupboards beneath. At the other end, on a small plinth, will be a wood-burning stove beside a table and chair with a pair of armchairs in the middle of the hut and shelves for books on the walls. Above the bed I will fit a small stained-glass window which I found in a local antique shop. I still need to make a door – probably a stable door with a window in the upper half as the hut will need as much light as I can get.
More to follow, in due course, including photos of the hut itself.
Re: My "other" project - the shepherd's hut
Morning Fred,
That sounds like quite a project, looking forward to seeing some more photo's.
Cheers,
Chris
That sounds like quite a project, looking forward to seeing some more photo's.
Cheers,
Chris
2A - 39 FG 70
Re: My "other" project - the shepherd's hut
Hiya Fred!
,
I will be following along, and look forwards to the piccies and the occasional update mate.
Regards,
I will be following along, and look forwards to the piccies and the occasional update mate.
Regards,
For Those That Have Had To Fight for It, Life Has Truly A Flavour The Protected Will Never Know.
'First my weapon. Then my equipment. Then myself.'
Neil.
09FM98. 1973 Ex SIII FFR Now 3.5 V8 LWT Coiler.
55HG98. 1980 SIII FFR PARA RECCE. Ex 1, 2 and 3 PARA.
Td5 90 XS.
'First my weapon. Then my equipment. Then myself.'
Neil.
09FM98. 1973 Ex SIII FFR Now 3.5 V8 LWT Coiler.
55HG98. 1980 SIII FFR PARA RECCE. Ex 1, 2 and 3 PARA.
Td5 90 XS.
Re: My "other" project - the shepherd's hut
Interesting project, sort of thing I get into, carry on with the good work 
Graham.
Gatwick, west Sussex
Buy British, now it's more important than ever.
1980-83 GS Lightweight 57KB99
Sankey narrow track 08ES81
1942 350cc Ohv Ariel W'ng dispatch bike
Gatwick, west Sussex
Buy British, now it's more important than ever.
1980-83 GS Lightweight 57KB99
Sankey narrow track 08ES81
1942 350cc Ohv Ariel W'ng dispatch bike
-
andrewjsimpson1977
- Cake Guru
- Posts: 3613
- Joined: Tue Aug 11, 2015 3:31 pm
- Location: Befordshire
Re: My "other" project - the shepherd's hut
You don’t like small projects do you Ian!
Hat off to you - it’s going to be fantastic when it’s finished.
Re: My "other" project - the shepherd's hut
Wow, what an interesting project, sounds like an awful lot of work, but I know the end result will be great.
I doff my cap in respect, keep up the great works, and look forward to future updates and photos.
Brian
56FL65 - LWT FFR 24v
61FL39 / 94AV44 - 101 RHD Radio Body 12v
55KL83 - Harley-Davidson MT350
- - - - - - - Can Am Bombardier 250
56FL65 - LWT FFR 24v
61FL39 / 94AV44 - 101 RHD Radio Body 12v
55KL83 - Harley-Davidson MT350
- - - - - - - Can Am Bombardier 250
- removeduser185
- Cake Guru
- Posts: 3531
- Joined: Thu Jun 18, 2015 10:37 pm
Re: My "other" project - the shepherd's hut
Well thanks chaps, for the positive reaction and the support. I'm most grateful - as I so often am for the help and encouragement we get on here.
OK, just a couple of photos to bring you up to date. Today was spent putting the insulation into the roof and walls until we ran out. I am using the fleeces from a local farmer as much as possible, but, because they are tricky to handle, I used commercial sheep's wool insulation for the roof as it is easier to install.
This photo also shows the mattress ready for the bed which I will start making as soon as I have the cladding in place.
The hut itself is, as I said, 16' by 7'6". I haven't yet cut the holes for the windows - I'll do that soon and before I glaze them as, otherwise, the screw holes are concealed behind the glass and putty.
This is what the interior construction looks like:
You can also see the light over the bed and the switch. It all works (or did - knowing how my Lightweight deteriorated as soon as it was finished, who knows!)
And this is a photo of the stove:
One of my next jobs will be to cut a hole in the roof for the chimney - I'm not looking forward to that in case I cut it in the wrong place! And it'll be noisy cutting through the wriggly tin. The chimney has a double wall to prevent it scorching the woodwork.
That's it - you're up to date! Thanks all.
OK, just a couple of photos to bring you up to date. Today was spent putting the insulation into the roof and walls until we ran out. I am using the fleeces from a local farmer as much as possible, but, because they are tricky to handle, I used commercial sheep's wool insulation for the roof as it is easier to install.
This photo also shows the mattress ready for the bed which I will start making as soon as I have the cladding in place.
The hut itself is, as I said, 16' by 7'6". I haven't yet cut the holes for the windows - I'll do that soon and before I glaze them as, otherwise, the screw holes are concealed behind the glass and putty.
This is what the interior construction looks like:
You can also see the light over the bed and the switch. It all works (or did - knowing how my Lightweight deteriorated as soon as it was finished, who knows!)
And this is a photo of the stove:
One of my next jobs will be to cut a hole in the roof for the chimney - I'm not looking forward to that in case I cut it in the wrong place! And it'll be noisy cutting through the wriggly tin. The chimney has a double wall to prevent it scorching the woodwork.
That's it - you're up to date! Thanks all.
Re: My "other" project - the shepherd's hut
Brilliant I only wish I had the room for one.
Graham.
Gatwick, west Sussex
Buy British, now it's more important than ever.
1980-83 GS Lightweight 57KB99
Sankey narrow track 08ES81
1942 350cc Ohv Ariel W'ng dispatch bike
Gatwick, west Sussex
Buy British, now it's more important than ever.
1980-83 GS Lightweight 57KB99
Sankey narrow track 08ES81
1942 350cc Ohv Ariel W'ng dispatch bike
Re: My "other" project - the shepherd's hut
Looking good.
Are you going to fit a Sankey draught eye to it so you can drag it along with the Lightweight?
Regards,
Are you going to fit a Sankey draught eye to it so you can drag it along with the Lightweight?
Regards,
For Those That Have Had To Fight for It, Life Has Truly A Flavour The Protected Will Never Know.
'First my weapon. Then my equipment. Then myself.'
Neil.
09FM98. 1973 Ex SIII FFR Now 3.5 V8 LWT Coiler.
55HG98. 1980 SIII FFR PARA RECCE. Ex 1, 2 and 3 PARA.
Td5 90 XS.
'First my weapon. Then my equipment. Then myself.'
Neil.
09FM98. 1973 Ex SIII FFR Now 3.5 V8 LWT Coiler.
55HG98. 1980 SIII FFR PARA RECCE. Ex 1, 2 and 3 PARA.
Td5 90 XS.
Re: My "other" project - the shepherd's hut
Great work on your new bedroom Fred. I assume this new extension to your dwelling is for when you get chucked out of the house because of swearing created by the fact a certain Land Rover in the garage won't run smoothly
All joking aside, keep up the great work, and it is good to see the lwt has at least one use at present, storage of bed slats. Mine happens to be full of Sankey trailer parts that have yet to be painted with nato green, but have been primed.
Regards
Richard
Discovery Sport
15FM83 ex 15 Para and 7 PO's
Richard
Discovery Sport
15FM83 ex 15 Para and 7 PO's