
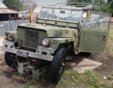
So I serviced the Fuel Pump and it seems to be pumping fuel but could not get it all the way up the lines to the fuel filter just ahead of the carb.
After sucking gasoline into my mouth too many times for my liking, I made and rigged this up:
https://photos.app.goo.gl/h3j5s39DMy3Yt6d89
https://photos.app.goo.gl/aZvg9m4RNj2XDKod7
A Mount Gay Black Barrel bottle with cork works a treat as a temp fuel tank. I took some of the old fuel line off of 44AJ20, drilled a hole in the top of the plastic lid on the cork, then drilled a smaller (tighter) hole through the cork. Once I pushed the tube through it was a perfect seal. Just have to remember not to drink the contents of the rum bottle.
Sadly the engine turned over (as it has been doing) but will not start. The Carb is squirting fuel when I pull the accelerator linkage but no combustion. I've asked a mate and he said perhaps I need to test the compression, check the sparks are sparking and then the points. Oh boy.
Want to get it started before the dismantle.
44AJ20 & 93KA28 Rebuild Barbados
Trimming up the 44AJ20 chassis
The chassis is so bad it's just being scrapped once I take off any useful bits.
Here is my stepfather helping me with some of the cutting back. Great to have another pair of hands for a change.
https://photos.app.goo.gl/SUjUN6Kqj335c8MJ7
Here's how 44AJ20 looks now. Sad, but she would have been sadder if she was left to fully die. At least some of her will live on in the rebuild.
https://photos.app.goo.gl/UsAWrMyM59kgmw7G6
Still a thing of beauty.
https://photos.app.goo.gl/mzw7VfoWbLeS8whq5
Here is my stepfather helping me with some of the cutting back. Great to have another pair of hands for a change.
https://photos.app.goo.gl/SUjUN6Kqj335c8MJ7
Here's how 44AJ20 looks now. Sad, but she would have been sadder if she was left to fully die. At least some of her will live on in the rebuild.
https://photos.app.goo.gl/UsAWrMyM59kgmw7G6
Still a thing of beauty.
https://photos.app.goo.gl/mzw7VfoWbLeS8whq5
Re: 44AJ20 & 93KA28 Rebuild Barbados
Exciting times
Regards
Richard
Discovery Sport
15FM83 ex 15 Para and 7 PO's
Richard
Discovery Sport
15FM83 ex 15 Para and 7 PO's
-
removeduser185

- Cake Guru
- Posts: 3531
- Joined: Thu Jun 18, 2015 10:37 pm
Re: 44AJ20 & 93KA28 Rebuild Barbados
And another engine reconditioned at 44 Command Workshop REME, Rowcroft Barracks, Ashford in the 90s.
Headlamp and Air Filter Painting
While waiting for a hoist for the old 44AJ20 engine I've been tinkering with refurbing some of the smaller parts from 93KA28.
Here are the Headlamps, dismantled. Coated in rust converter. I've now painted them black (not the outer which will be green bronze).
For the inner bit that had a reflective chrome finish, I used chrome metallic spray paint... seems okay.
Will post pics once I take them.
Here's the Air Filter hose end that connects to the carb... don't know all the fancy names. It's come out okay.
And the Air Intake Oil Filter itself. Shame I don't know the serial number to paint on. Anyone know what these serial numbers were or meant? I have another filter with partially visible text on it and am keen to keep it.
Here are the Headlamps, dismantled. Coated in rust converter. I've now painted them black (not the outer which will be green bronze).
For the inner bit that had a reflective chrome finish, I used chrome metallic spray paint... seems okay.
Will post pics once I take them.
- IMG_20180909_181131.jpg (1.54 MiB) Viewed 2983 times
- IMG_20180909_181054.jpg (1.38 MiB) Viewed 2983 times
- IMG_20180909_181203.jpg (2.06 MiB) Viewed 2983 times
Horn rebuild
Some more small rebuild stuff.
I have dual horns in 44AJ20 so I'm refurbishing them. The problem is I have no idea how to test them. I literally know nothing about electrical stuff.
One of the horns was not so bad, so it cleaned up pretty well inside and out.
The other one had a broken and dried out plastic outer casing as you can see in the above pic. I'll probably get another replacement but tried coming up with a fix.
I have dual horns in 44AJ20 so I'm refurbishing them. The problem is I have no idea how to test them. I literally know nothing about electrical stuff.
- IMG_20180912_193633.jpg (2.81 MiB) Viewed 2982 times
One of the horns was not so bad, so it cleaned up pretty well inside and out.
- IMG_20180913_195545.jpg (1.02 MiB) Viewed 2982 times
- Screen Shot 2018-09-18 at 11.41.17 am.png (795.16 KiB) Viewed 2982 times
- Screen Shot 2018-09-18 at 11.41.35 am.png (511.99 KiB) Viewed 2982 times
Horn rebuild 2
Here's the make-shift fix
- Screen Shot 2018-09-18 at 11.43.16 am.png (1.95 MiB) Viewed 2982 times
Engine Removal
Out she comes.
- Screen Shot 2018-09-18 at 11.48.26 am.png (991.24 KiB) Viewed 2981 times
- Screen Shot 2018-09-18 at 11.49.56 am.png (919.63 KiB) Viewed 2981 times
- Screen Shot 2018-09-18 at 11.51.22 am.png (969.52 KiB) Viewed 2981 times
Post Engine Removal
Then got rid of all the old chassis bits and had a serious clean up.
Then 93KA28 was pushed into place with my wife and me using a long wooden beam as leverage.
What a day! The end of one dismantle and now onto the next.
- Screen Shot 2018-09-18 at 11.53.45 am.png (2.05 MiB) Viewed 2978 times
- Screen Shot 2018-09-18 at 11.54.33 am.png (3.59 MiB) Viewed 2978 times
- Screen Shot 2018-09-18 at 11.56.45 am.png (2.36 MiB) Viewed 2978 times
- Screen Shot 2018-09-18 at 11.59.21 am.png (965.22 KiB) Viewed 2978 times